Right-clicking on any plugin opens a popup menu with many options:
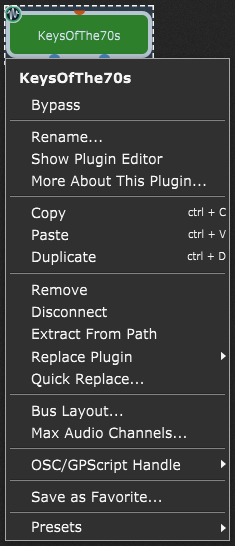
1. Bypass - places the plugin in bypass mode. Plugin blocks that are bypassed are overlaid with a red transparent rectangle, as shown in the illustration below:
Similarly, you can select multiple plugins and bypass them.
Note: There is a difference between bypassing a plugin and muting it.
For virtual instrument plugins, bypassing actually turns off processing for that plugin, thus stopping the sound from being generated.
Muting, which is accomplished by inserting a Gain Control, Gain and Balance, Gain and Balance (m->s), or one of the audio mixer plugins and clicking the Mute button or setting its volume slider to 0, causes an audio signal to continue to be generated, but with the output silenced.
For example, if you are playing back a loop or click track during live performance but you don't want the audience to hear it for a period of time, mute the plugin instead of bypassing it. That way, it will continue to play (in your headphones, if so routed) until you're ready for the audience to hear it again.
In contrast, bypassing an effects plugin causes incoming signals to pass through the plugin unchanged.
2. Rename... - renames the displayed name (useful if you are using the same plugin more than once).
3. Show Plugin Editor - opens the plugin's editor (same as double-clicking on the plugin block).
4. More About This Plugin... - opens the default Web browser and loads the plugin's homepage (an Internet connection is required to load the plugin's homepage).
5. Copy - copies the plugin into the clipboard.
6. Paste - pastes the plugin from the clipboard.
7. Duplicate - creates a duplicate of the plugin. Note: check the Additional tips chapter to learn how to duplicate a plugin with inputs.
8. Remove - removes the plugin from the Wiring area surface. You can also select one or more plugin blocks by dragging over them with your mouse and remove them from the Wiring area surface by pressing either the Delete or Backspace keys on your keyboard.
9. Disconnect - removes all connections to and from this plugin.
10. Extract from path - extracts this plugin block from the audio or MIDI path; see the following example (A):
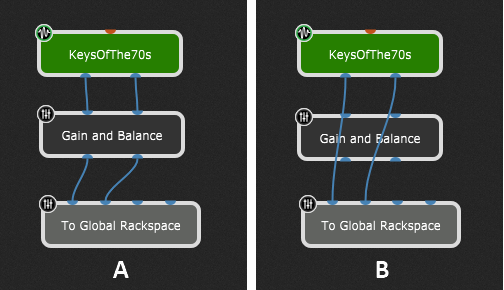
Clicking this menu item will extract the current block (Gain and Balance block) from the audio path, i.e. connect the KeysOfThe70s block with the To Global Rackspace block (see (B)).
11. Replace Plugin - choose a plugin from the menu that pops up to replace the current plugin with another.
12. Quick Replace... - opens a new window that allows you find plugins quickly based on partial names:
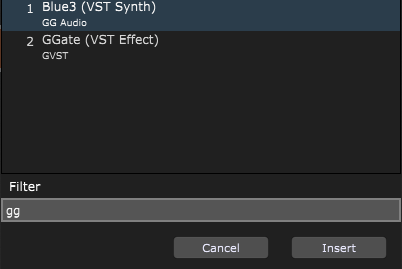
Type in a search query, such as "gg" to quickly find all plugins with that name or their developers name. You can also type in "synth" to display all your synth plugins.
13. Bus Layout... - opens the Channel and Bus Layout dialog:
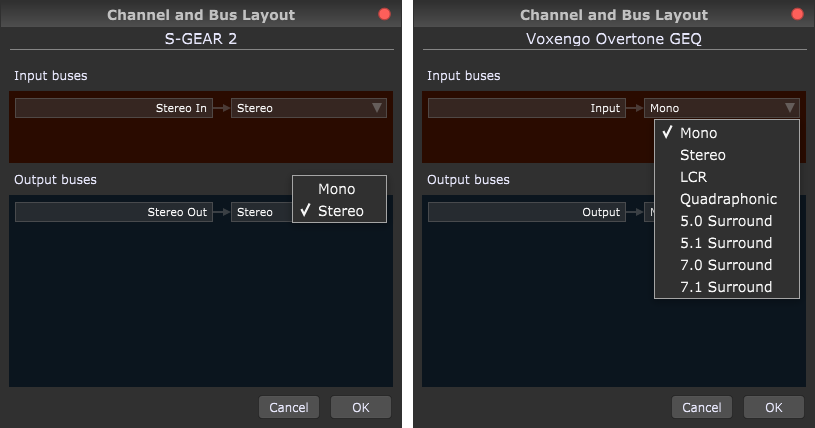
Some plugins support multiple configurations of inputs and outputs, usually mono and stereo, and sometimes multichannel. In a DAW environment, the DAW deals with configuring these input and output buses. In Gig Performer, you can access a plugin's bus options directly in the Channel and Bus Layout dialog.
Many plugins will simply show a stereo input/output bus, but some plugins, such as the eight-channel Voxengo Overtone GEQ, shown in the screenshot above, offer many more configurations.
14. Max audio channels... - this feature allows you to set the maximum number of audio pins for the selected plugin block:
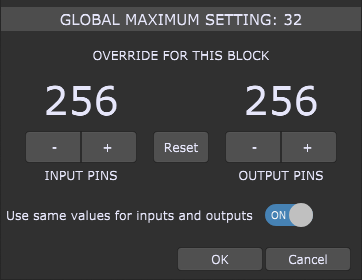
The global maximum setting (for all plugins) can be changed in Display Options. This setting can be overridden for the selected block; default current maximums for the override are 256 input/output pins, and their number can be set up independently if you turn off the Use same values for inputs and outputs toggle button. This feature is very useful for certain plugins that expose a large number of channels (64 or even 128), making the plugin block extremely wide. In such cases, you can use this option to force the plugin to display only the first few channels.
15. OSC/GPScript Handle - allows you to set a handle to be used by GPScript and OSC, and to enable OSC and/or GPScript.
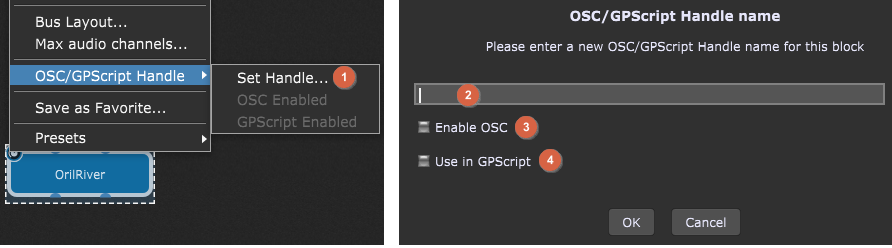
Click on the Set Handle... menu item (1); new window appears, where you can type in a name of the handle (2), and then activate Enable OSC (3) and/or Use in GPScript (4) if you want to use these advanced features. Refer to OSC and Gig Performer and GPScript chapters to learn more.
16. Save as Favorite... - allows you to save a plugin as favorite. Refer to the Save one or more plugins as favorites section for more information.
17. Presets - allows you to load plugin's integrated (factory) presets or custom user presets. See the Plugin Editor More menu section to learn more.
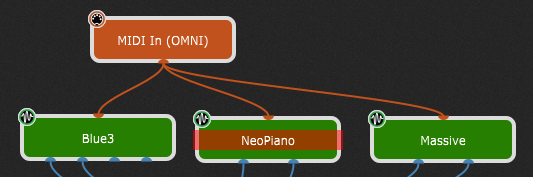
Note: the MIDI In plugin block right-click menu is the same as other plugins, but with the addition of:
Change MIDI Input Device - reassigns the MIDI In or MIDI Out block to the MIDI controller chosen from the popup menu.