To get started as a keyboardist, first insert the desired synth plugin and connect the existing MIDI In (OMNI) block to it (check this chapter to learn more):
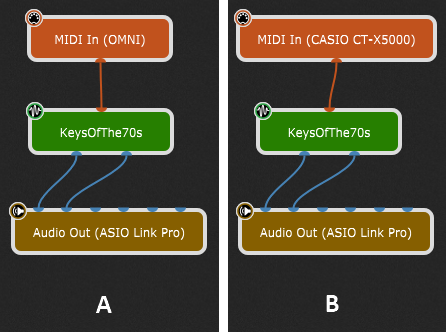
Incoming MIDI messages from any of your keyboards will now be sent to the synth plugin. Complete the signal chain by connecting the synth plugin block to your audio interface outputs. This very basic setup is displayed in image (A). At this point you should be able to play your connected keyboard(s) and hear the result.
If you use more than one keyboard and want each one to control different plugins, you will need to replace the MIDI In (OMNI) block with MIDI In blocks associated with each keyboard (MIDI device). To do this you can either insert a new MIDI In block or right click on the MIDI In (OMNI) block and replace it with the desired one, as indicated with (B).
When you have finished adding your plugins, switch to the Panels view, and enter Edit mode. Add panels and widgets for the plugin parameters you mostly use or want to control either from the panel or from your keyboard or other MIDI control surface. Here is an example:
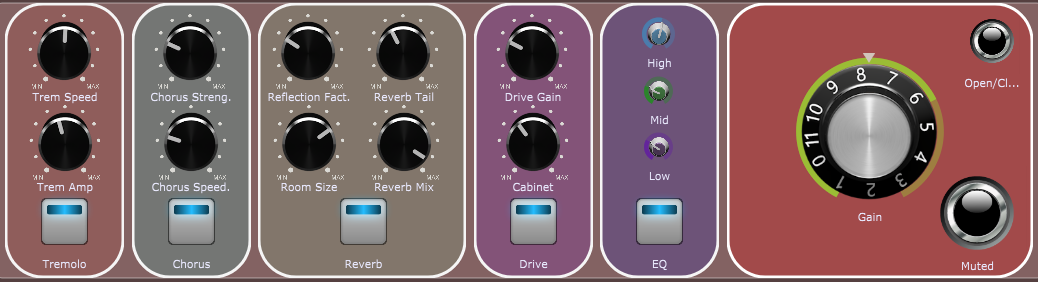
Refer to the Widgets chapter to learn more. Make sure to also check our built-in templates and Community-driven shared rackspaces (click Help -> Community -> Community Shared Gigs, Rackspaces and More) to access nicely designed, community created rackspace and gig files that you can use directly or as templates for your setups.
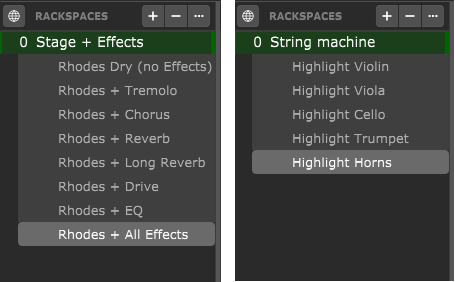
Depending on the features of your plugins (i.e. are they multi-timbral) you can organize your rackspaces and variations in many different ways, for example:
Gig Performer 4 includes the Global rackspace where you can place your common effects, such as reverb or delay or other plugins that you might want to be present all the time (i.e. an Audio File Player or a MIDI File Player). In the screenshot below are shown the Wiring views of two rackspaces and the Global rackspace. One rackspace contains an acoustic piano (1) and the other contains an electric piano (2). A delay is added to both of these sounds in the Global rackspace (3):
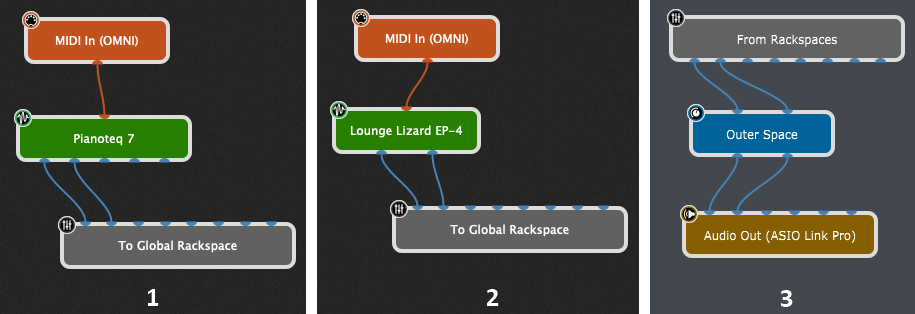
So rather than inserting a delay plugin in both rackspaces, you can simply insert it in the Global Rackspace.
Check the Global Rackspace chapter to learn more about the Global rackspace.
As a keyboardist you'll appreciate that each rackspace supports a mechanism that allows your sounds to stay on until you release all the keys that you were holding down (or the sustain pedal if it was down), even if you switch to another rackspace with different sounds for the next part of your set. This mechanism is called Patch Persist (check the MIDI Patch Persist section in the Rackspace properties).
When this feature is disabled, when you hold a note down and then switch to the other rackspace, the note you're holding down stops immediately.