First, take a brief look at the Wiring view chapter where basic concepts such as pins and plugin connections are described.
Let's insert two plugins, a reverb and a synth:
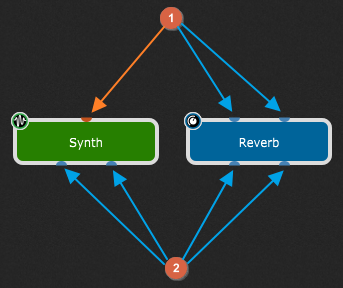
With (1) are indicated input pins (or input plugin ports) and with (2) are indicated output pins (or output plugin ports). Note that pins can be blue or orange (indicated with orange and blue arrows); blue pins indicate audio ports and orange pins indicate MIDI ports.
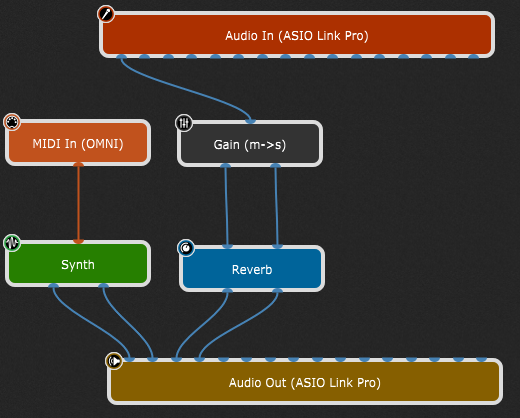
Plugin blocks are connected by virtual wires, where an output pin of one plugin is connected to an input pin of another plugin. Note that orange pins cannot be connected to blue pins (and vice versa). For example, you can connect directly the Audio In block to the Audio Out block, but cannot connect directly the MIDI In block to the Audio Out block.
Likewise, orange connections (orange virtual wires) represent MIDI connections and blue connections (blue virtual wires) represent audio connections:
The power of Gig Performer lies in the fact that you can connect plugins any way you like, e.g. you can control multiple synths with one keyboard (you can connect an output pin to multiple input pins) or you can connect multiple output pins to a single pin:
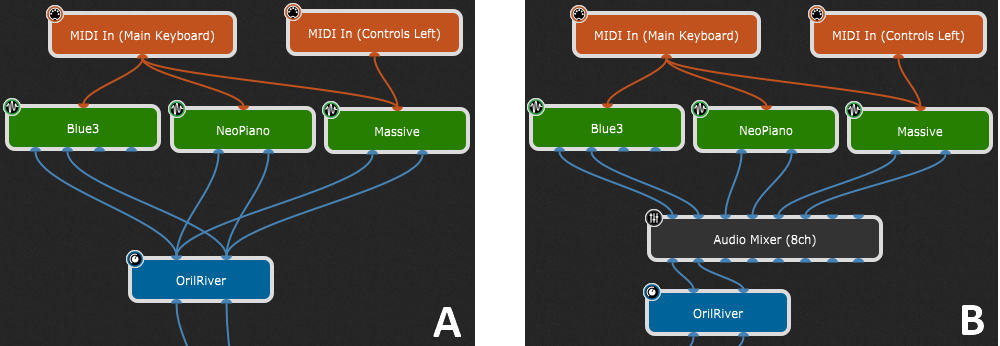
When you connect multiple output pins to a single pin, signals are mixed automatically (A); to have more control over your sound, use the built-in Audio Mixer plugin (B).
The number of input and output pins depends on the plugin manufacturer and provided bus layout settings; in the screenshot below note the difference between mono input and output buses and 7.1 Surround input and output buses for the same plugin:
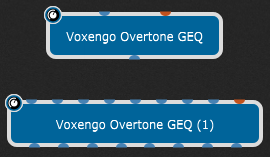
Gig Performer does let you set a maximum number of pins as a global option (see Display options -> Maximum number of audio channels to display in blocks) and also to control the maximum number of pins on each plugin individually.
Refer to the Plugin contextual menu chapter to learn more about bus layout and max pins in plugin blocks.
Check out also this blog article to find out more on plugin pins: My plugin has so many output ports - which ones do I use?